
A rainy-day card with actual folds
Toddler Umbrella Craft with an Accordion Paper Canopy
A little paper folding turns a flat sheet into a raised umbrella. Your toddler handles the rainy scene; you help with the pleats and the bit that insists on springing open.

The umbrella is the star here, but your toddler may decide the rain needs to be purple and the handle needs a face. Both are reasonable artistic decisions. What matters is getting the paper fan attached firmly enough that it survives being admired with a finger.
This toddler craft umbrella project is a flat backing card with a raised, pleated canopy. It does not open into a working umbrella. There are no sticks, sharp ribs, or tiny fasteners to hunt for under the table.
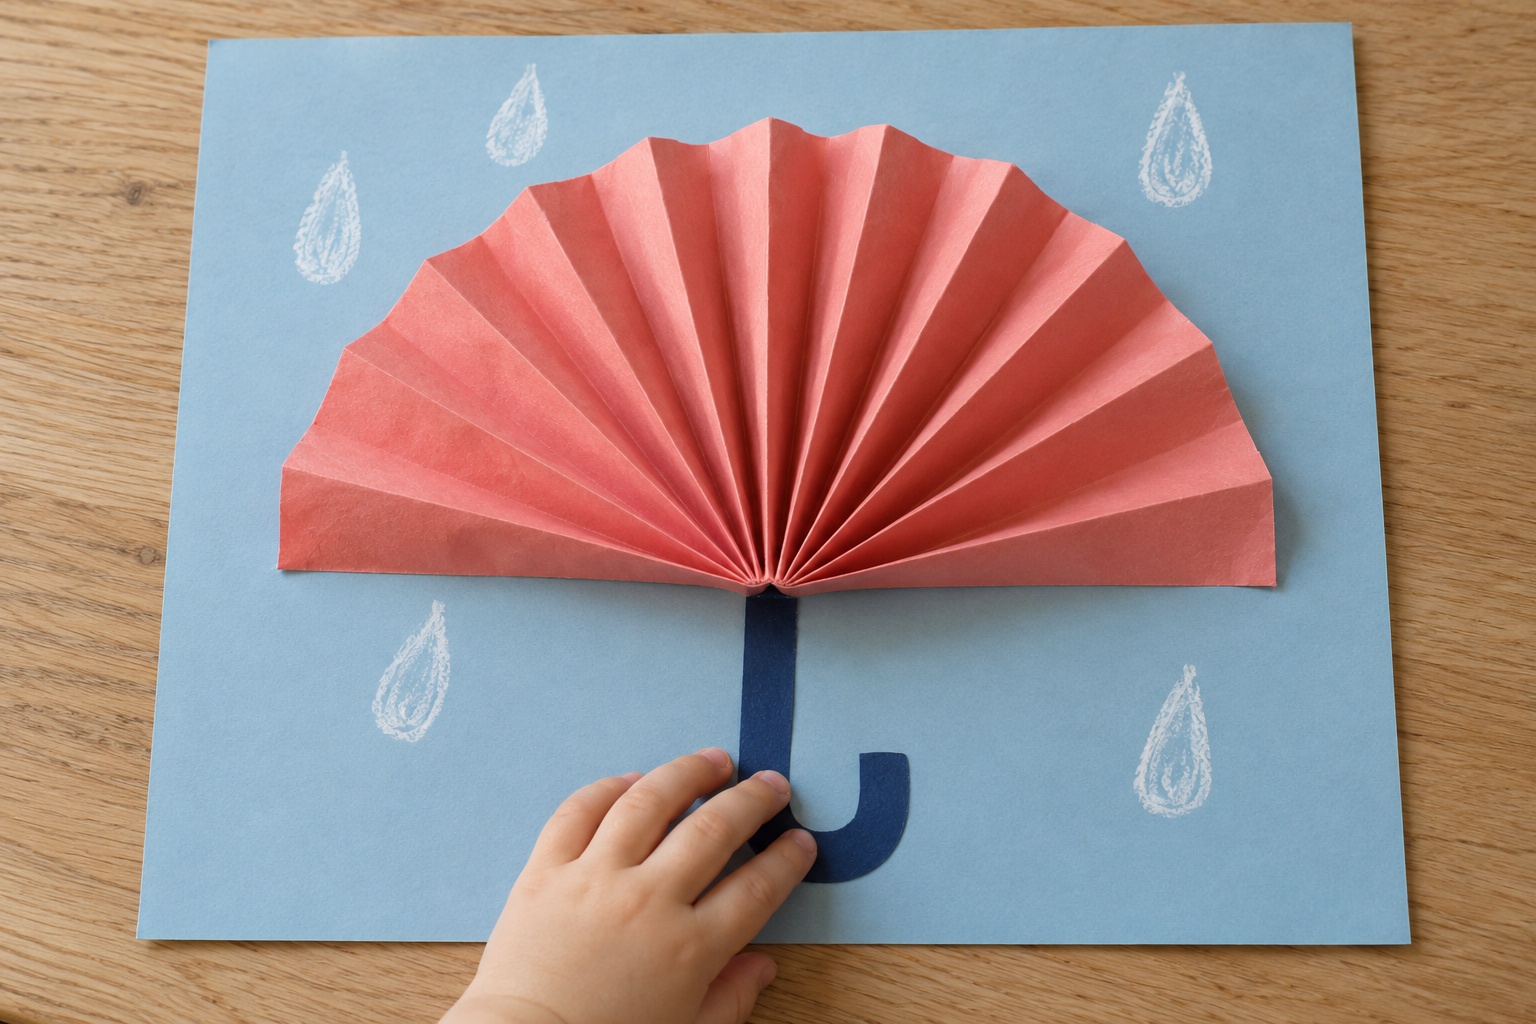
Accordion-fold a 12-by-8-inch rectangle of thin paper, fold the bundle in half, and glue the two inner panels together. Open it into a semicircle, attach the two outer panels to cardstock, and add a paper J handle underneath.
What you need for one umbrella card
Thin paper for folding; firm paper for the backing.
- One 12-by-8-inch rectangle of thin colored paper, coral in the photos
- One 12-by-9-inch sheet of cardstock, pale blue in the photos
- One 4-by-3-inch scrap of navy construction paper for the handle
- One glue stick
- White and colored crayons
- Scissors for adult preparation
- A ruler and pencil
- Two clothes pegs for holding the center seam while it dries; adults keep these
Use ordinary lightweight craft paper for the canopy. Thick cardstock can be folded, but the springy bundle is harder to pinch and tends to pull away from the backing. Save the sturdy sheet for the part that has to carry everything.

Make the background before the umbrella arrives
Put the blue cardstock sideways, with the 12-inch edge running across the table. Lightly mark the middle area where an approximately eight-inch-wide canopy will sit. Your toddler can draw around that space while you start the folding.
White crayon raindrops show up nicely against blue. Big loops and diagonal rain lines are easier to see than tiny dots. Leave the crayon scribbles alone even if the forecast now includes spaghetti. Once the umbrella goes on, the whole picture usually makes sense.
For a separate painting session, our white-crayon rain painting uses the same weather idea but turns the hidden marks into a watercolor reveal. Keep this backing dry: wet paint and a freshly glued fan are an unnecessarily dramatic combination.
How to fold and attach the canopy
- Cut the canopy rectangle.
Measure 12 inches across and eight inches tall. An adult trims it, then turns the long edge toward you. The eight-inch dimension becomes the length of the folded bundle; after folding that bundle in half, the fan will have roughly a four-inch radius.
- Start a half-inch fold.
Fold a narrow strip along one eight-inch side. Press from the middle toward each end. A ruler can help you line up the first fold, but remove it before your toddler presses the crease.
- Flip, fold, repeat.
Turn the paper over and fold another half-inch strip back on itself. Keep alternating directions across the 12-inch width. Your toddler can press each fold after you line it up. The result should be one narrow zigzag bundle, not a rolled tube.
- Fold the bundle in half.
Bring its two short ends together so the eight-inch bundle folds into two four-inch arms. Pinch the halfway crease firmly. Open the arms a little and find the two inner paper panels that meet each other.
- Glue the center seam.
Rub glue along one of those inner panels and press it against its partner, matching the outer ends. Hold the seam or let an adult clip it with the pegs. Give it a few minutes before stretching the fan open; wet glue has no interest in your schedule.
- Test the semicircle.
Spread the outer arms gently until the bottom edge runs approximately straight across and the curved edge sits above it. Check that the center seam stays closed. If it pulls apart, close the fan and press that seam again.
- Attach only the outer panels.
Put glue on the backs of the two outermost pleat panels. Press one onto the left side of the blue card and the other onto the right, keeping the fan’s center point between them. Leave the middle pleats unglued so they rise away from the backing.
- Add the handle and dry flat.
Cut a broad J from the navy scrap, with a stem about half an inch wide. Slide its top just under the fan’s center and glue the handle to the backing. Let the card dry on the table before picking it up by a corner.

The folding part belongs to both of you
For a three-year-old, set one job at a time: press this crease, draw this rain, rub glue on this flat panel. Handing over the entire rectangle with “make an accordion” is a fairly ambitious opening offer.
You can prepare the fan before the activity if folding is going to swallow all the fun. Keep one spare paper strip for experimenting so your toddler can squash, fold, and unfold something without dismantling the actual canopy.
The same adult-setup, child-making split works in our cardboard weaving loom tutorial: you prepare the structure and your child does the satisfying repeated part. There is no prize for making every stage happen in one sitting.
When the umbrella looks a bit overwhelmed
The fan looks lopsided
Close it and check whether the two ends meet. If the middle fold is off-center, move that crease before gluing. Small differences in pleat width are fine; a much longer arm makes the canopy tilt.
The center opens up
Glue the broad inner panels, not just their thin edges. Close the fan, press the panels together, and wait longer. Adding more glue to an already wet seam usually creates a slippery seam.
It will not stay on the backing
Use firmer backing and flatten the two outside panels before gluing. Hold those panels down individually. Do not glue every ridge; that removes the raised shape you just spent time folding.
The paper cracks at the fold
Switch to thinner paper and press creases with fingertips rather than scraping hard along them. Painted paper must be completely dry before folding. Save a damaged canopy for a collage instead of repeatedly bending the tear.
Change the scene, keep the folding method
A spotted umbrella
Draw large spots on the flat canopy rectangle before folding. Let marker ink dry first. The spots disappear into some pleats and reappear on others, which gives your toddler something to inspect once the fan is open.
A small greeting card
Use an eight-by-four-inch canopy rectangle, quarter-inch pleats, and a six-by-eight-inch backing. The finished fan is about four inches across. An adult writes the message on the back so the front stays a weather picture.
A cloud-and-puddle scene
Add a broad paper cloud above the umbrella and a flat blue puddle below it. Use paper shapes instead of cotton balls or loose decorations. Leave enough room around the fan that the extra pieces do not push against its folds.

Where to put the finished card
Display it on a shelf or attach the backing to the fridge with magnets kept out of your child’s reach. Put any fixing on the blue sheet, never on the fan. A canopy squashed under a magnet looks less like an umbrella and more like laundry.
For a sunny window companion, the tissue-paper suncatcher hangs flat and lets light through. This umbrella needs its little pocket of space in front.
When the weather clears, the paper-bag kite takes the paper-making session outside. It is a short-tether wind toy, so you can keep it close rather than attempting to send your toddler’s artwork into the next county.
Umbrella craft questions
Can a three-year-old make the paper folds?
Your toddler can press folds that you line up, but you may need to make the zigzag bundle yourself. Decorating, choosing colors, and gluing the flat handle are still useful parts of the project. Stop folding for a moment if the paper is becoming a tug-of-war.
Can I use construction paper for the canopy?
Thin construction paper works, especially with slightly wider pleats. Very thick sheets are harder to bend at the midpoint and glue closed. Try one scrap fold before committing the full sheet.
Does this paper umbrella open and close?
The fan opens during assembly, then stays attached to the backing. It is a raised picture rather than an umbrella toy with moving ribs. If your child wants to explore opening a fan, keep a separate unmounted spare.
Why is the canopy too big for my card?
The finished width is roughly the original bundle length, which is the rectangle’s shorter dimension. An eight-inch-tall rectangle makes a fan approximately eight inches across. Reduce that dimension or choose a wider backing.
How do I store a three-dimensional paper card?
Set it in a shallow box with the canopy facing up. Keep heavier artwork out of the box so the pleats do not flatten. If the fan gets squashed, lift the creases gently after checking that both glued ends are still attached.


Leave a Reply