
Sticky paper, sunny window
Tissue Paper Contact Paper Suncatcher for Toddlers
Torn tissue paper and clear contact paper make a bright window craft without a puddle of glue. Your toddler gets to stick colors wherever they like; you get a finished piece that looks especially good when the sun hits it.

A good activity does not need a huge supply list. This one uses ordinary things you can set out in a few minutes, with a clear place to stop when your child has had enough. The setup below gives you a starting point; your child will probably invent the next part.
Tissue Paper Contact Paper Suncatcher for Toddlers
A practical, parent-tested setup with simple supplies.
Supplies and quantities
- Two clear contact-paper rectangles, each about 12 × 16 inches
- Three tissue-paper sheets in different colors, torn into palm-size pieces
- Four short strips of painter’s tape to anchor the work
- Child-safe scissors for an adult to trim edges
- One shallow tray or bowl for the tissue pieces
- Four small pieces of removable tape for window display

How to make it, step by step
- Cut the contact paper first. Cut two equal rectangles, roughly 12 by 16 inches. A slightly smaller sheet is fine if your window is narrow. Keep the backing on the second rectangle for now; you will use it as the cover.
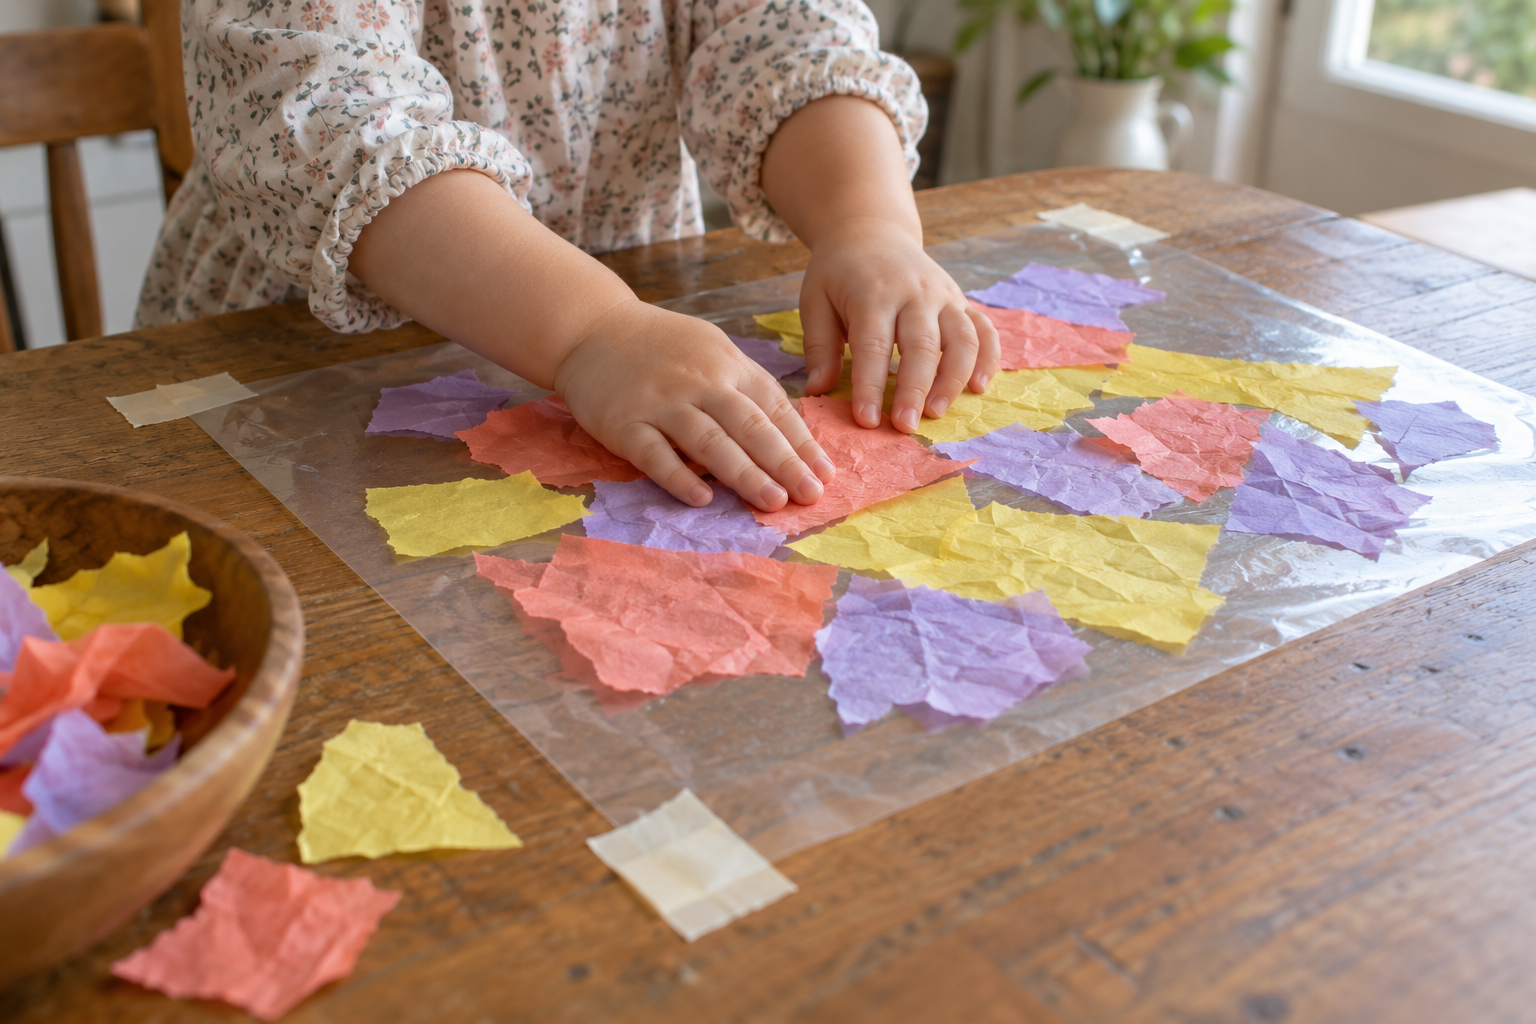
- Anchor the sticky sheet. Peel the backing from the first rectangle and set it sticky side up on your table. Tape the four corners outside the main design area. Press the tape firmly so the sheet does not follow little hands every time they lift a finger.
- Prepare the colors. Tear tissue paper into pieces about the size of your toddler’s palm. Give your child a small bowl of two or three colors. Huge piles look exciting until they blow across the room when someone sneezes.
- Let your child arrange the pieces. Show how one piece sticks with a gentle press, then step back. Overlapping colors look especially pretty in a window. Leave a clear border of about half an inch so the top contact-paper sheet can seal to the bottom one.
- Cover and seal. When your child is finished, peel the backing from the second sheet. An adult should lower it slowly from one short edge to the other, smoothing outward with a flat hand. If the sheets touch too early, leave them together rather than pulling hard and tearing the tissue.
- Trim and display. Trim ragged outer edges while leaving a sealed clear border. Use removable tape at the corners to mount it to a clean window. Choose a spot your toddler can see without climbing furniture.
Making it work at home
Why this version works for toddlers
There is no wet glue to spread and no drying time to negotiate. The sticky sheet stays on the table while your child makes choices, and the cover sheet keeps the tissue contained once the craft is done. It is an actual thing you can display, even if the design is ninety percent purple in one corner.
If your child wants a brush instead of sticky paper, try our painter’s tape watercolor art. Our easy toddler crafts also include other low-mess options for days when the window is already full.
Set up the table before inviting your toddler
A smooth kitchen table is easier than a textured floor or rug. Put the tissue pieces in a shallow bowl on the child’s dominant-hand side. Keep the second contact-paper sheet out of reach until the design is finished. Once it sticks to itself, it is remarkably committed to that decision.
If you only have a few minutes, prepare the two sheets and tissue pieces ahead of time. The child’s part can begin immediately. A flat tray under the work catches the scraps, but make sure the contact paper is taped to a surface large enough that its corners stay put.
What to do when your child keeps rearranging
Contact paper is forgiving for the first few seconds, but delicate tissue may tear if repeatedly pulled up. Offer a fresh piece instead of trying to rescue a shredded one. You can also make two smaller rectangles so a child who wants to start over has a second surface ready.
Some toddlers prefer to press each piece with one finger. Others dump the entire bowl and pat it flat. Both approaches make a suncatcher. If the sticky surface becomes too crowded, gently move the unused pieces back into the bowl and show an open area near the edge.
Displaying and storing the finished craft
Tape the suncatcher to the glass rather than sticking bare contact-paper adhesive directly onto it. The sealed design can move to a different window later without leaving a sticky layer behind. Wipe the glass first so your removable tape holds.
Sunlight makes overlapping tissue colors glow. If your window gets harsh afternoon sun, expect some colors to fade over time. When the display has had its moment, peel off the tape and recycle or discard according to local guidance for plastic-coated paper; contact paper generally does not belong in ordinary paper recycling.
Troubleshooting: real fixes
The contact paper curls
Tape all four corners before the child starts. If the sheet keeps rolling, lay a book on one edge for a minute, then retape it flat.
Everything sticks to your child’s sleeve
Move the bowl farther from the sticky edge and tuck sleeves up. Offer one tissue piece at a time until the child gets the hang of lifting a hand cleanly.
The cover traps big air bubbles
Press from the center toward the outside with a flat hand. Tiny bubbles are fine; lift only the unsealed edge if you need to straighten a large fold.
The tissue hides the light
Use fewer layers, especially with darker colors. One overlapping corner can be beautiful without covering every inch twice.
Three easy variations
Autumn window
Try orange, yellow and a little red. Cut the sealed sheet into a broad leaf shape after your child finishes; keep a clear sealed border around the tissue.
Color-family window
Put out two tissue colors and notice how they overlap in the light. You do not need to turn this into a lesson; your toddler can simply decide which piece goes next.
Younger toddler version
Prepare larger tissue pieces and a smaller contact-paper rectangle. Sit beside your toddler and handle the final sealing and scissors yourself.

A quick safety note
Frequently asked questions
Can I make a tissue paper suncatcher without contact paper?
Yes, but the method changes. You can sandwich tissue between two laminating sheets or use glue on a clear plastic surface. This version relies on contact paper because it is immediately sticky and does not need drying time.
Which side of contact paper faces up?
The sticky side faces up while your toddler arranges the tissue. Tape the corners to the table so it stays in place. The second sheet goes sticky side down over the completed design.
Will a contact paper suncatcher stick directly to a window?
It can, but the exposed adhesive may leave residue. Seal the tissue between two sheets and use removable tape to attach the finished piece. Test the tape on a small part of your window frame if you are worried about a finish.
How do I stop tissue paper from bunching up?
Tear pieces fairly large and lay them down flat with one or two fingers. If a piece folds, leave it for texture or press another flat piece beside it. Avoid tugging hard after it sticks.
Can a two-year-old do this craft?
Many two-year-olds enjoy pressing prepared tissue pieces onto the sticky sheet with an adult nearby. You should do the cutting, tape the sheet down, and add the cover. Keep loose tape and scraps out of mouths.
For a change of scene, set up a cardboard box grocery store on the floor, or try a supervised frozen dinosaur ice rescue when you have a tray and towel ready.

Leave a Reply