
A dinosaur with a cold problem
Frozen Dinosaur Ice Rescue Activity for Preschoolers
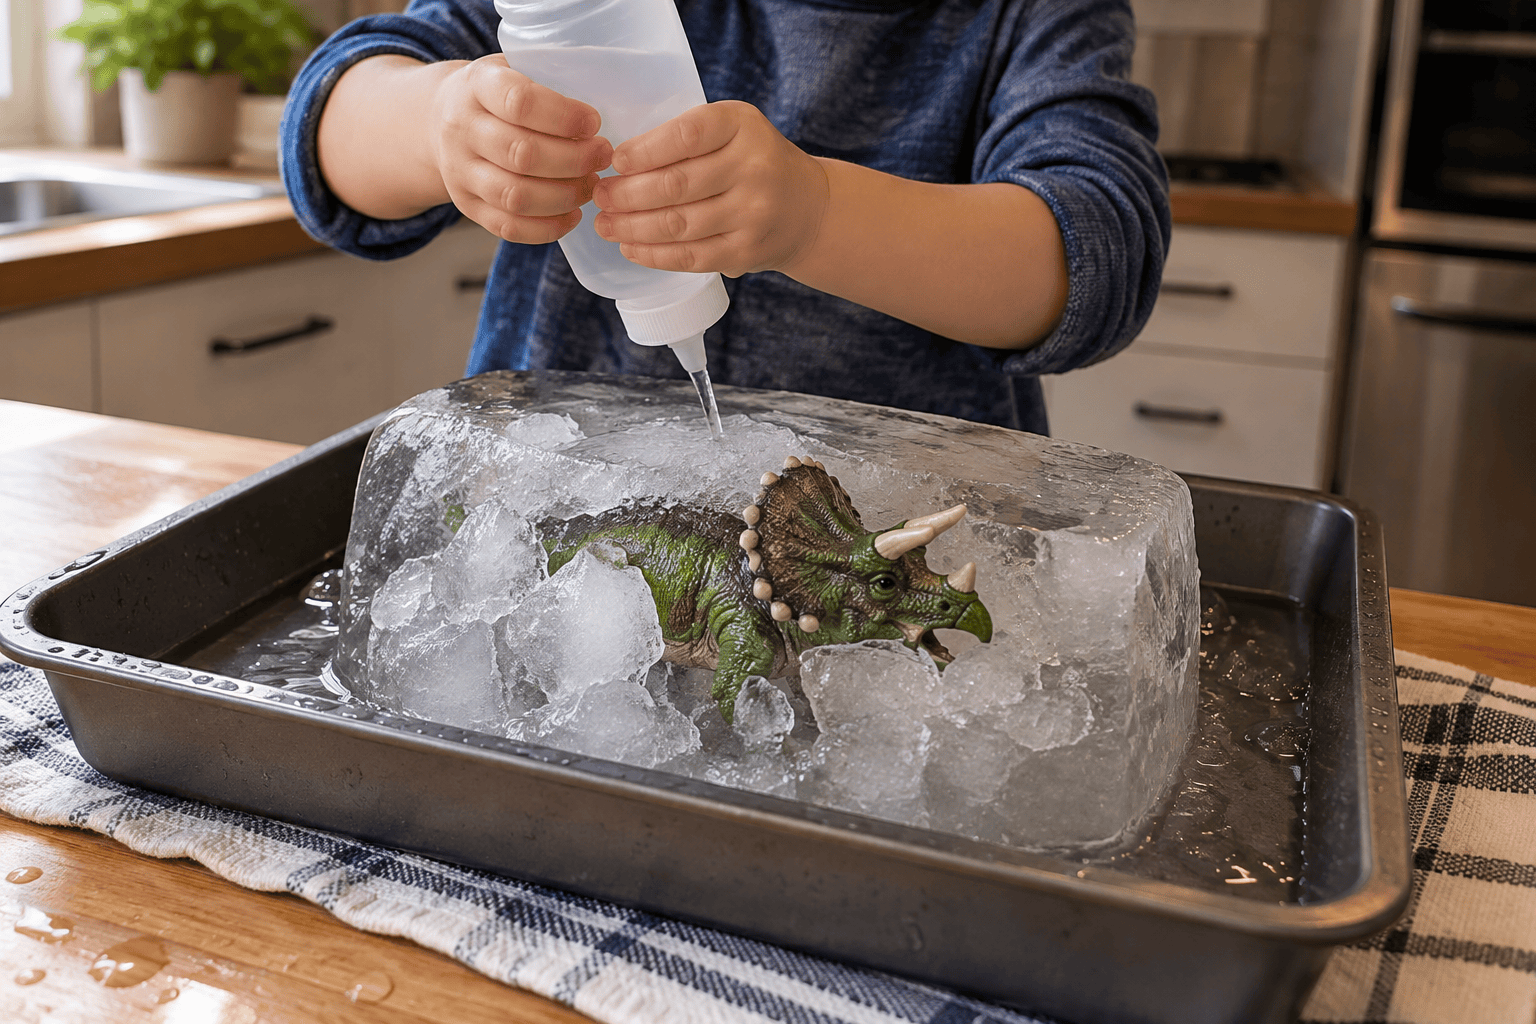
A large toy dinosaur trapped in a block of ice gives your preschooler a very clear mission: get it out. You can set it up the night before, then hand over a small squeeze bottle of lukewarm water and let them watch the ice change in a deep tray.

A good activity does not need a huge supply list. This one uses ordinary things you can set out in a few minutes, with a clear place to stop when your child has had enough. The setup below gives you a starting point; your child will probably invent the next part.
Frozen Dinosaur Ice Rescue Activity for Preschoolers
A practical, parent-tested setup with simple supplies.
Supplies and quantities
- One large washable plastic dinosaur, at least 5 inches long
- One freezer-safe food container, about 7 × 10 inches
- Enough water to cover the toy by about 1 inch
- One deep tray or shallow roasting pan
- One small plastic squeeze bottle, about 8 ounces
- Lukewarm tap water for refills, about 2 cups
- One thick towel for under the tray

How to make it, step by step
- Choose a big toy. Pick one washable plastic dinosaur without detachable parts. It should be too large to fit into a young child’s mouth. Check that its color does not rub off when wet; a beloved electronic dinosaur should sit this one out.
- Freeze it overnight. Place the dinosaur in a freezer-safe container and pour in enough water to cover it by roughly an inch. Set the container level in the freezer. A large block may need overnight or longer to freeze completely.
- Prepare the rescue spot. Put a thick towel on a stable table or floor, then set a deep tray on it. Fill the squeeze bottle with lukewarm tap water. Keep a pitcher nearby for an adult to refill it.
- Release the ice block. Briefly run cool tap water around the outside of the container or let it sit for a minute. Turn it upside down over the deep tray and ease out the block. Do not bang the container against the table.
- Start with a slow squeeze. Show your child how to direct a little water onto one place in the ice. Look for a small channel and let them choose where to aim next. When the bottle is empty, refill with lukewarm water.
- Lift the dinosaur when loose. Let the ice melt until the toy moves easily. Do not ask your child to yank a horn or tail that is still frozen in place. Place the rescued toy on the towel, then empty the tray and dry the floor.
Making it work at home
Why use one large block?
A single big toy gives the activity a clear beginning and ending. You can see the dinosaur through the ice and decide where to squirt next. Tiny frozen trinkets create too many loose pieces once the ice melts, so this version keeps the materials deliberately simple.
This is a different setup from our foil boat sink-or-float activity: the toy starts inside solid ice and the play is about melting it out. If your child wants to switch from melting to floating after the rescue, that is a natural next activity.
How long the rescue takes
A thick block can take a while, especially if your child uses tiny squirts of water. That is part of the activity, but it does not have to become a test of patience. Make a shallower block by choosing a wider container, or start with the ice sitting in the tray for five minutes before inviting your preschooler over.
Lukewarm tap water helps more than cold water. Skip boiling or very hot water. You can take turns squeezing if the bottle is stiff, and you can call the mission finished when the dinosaur is loose even if chunks of ice remain.
Contain the puddles
A tray with sides matters more than a fancy tool. Ice tends to slide, and a toddler aiming a squeeze bottle does not necessarily share your definition of “inside the tray.” Put the towel beneath the tray, keep a second cloth nearby and make sure the table is not crowded with papers.
A bathroom floor or outdoor patio also works if you prefer not to use a table. On a cold day indoors, let the child wear sleeves that can be rolled up. They will probably touch the ice, then immediately tell you that ice is cold, which is fair feedback.
After the dinosaur escapes
Let your child wash the toy in the remaining meltwater for a minute if they want. You can use the released ice chunks for a little more supervised scooping, or simply pour them into the sink. Dry the tray and towel before storing them.
If they enjoyed the water part more than the rescue, our water sensory activities offer other contained setups. For an entirely dry pretend-play option, the cardboard grocery store is ready once the floor is dry.
Troubleshooting: real fixes
The dinosaur floats to the top while freezing
Freeze a shallow first layer of water, place the toy on it, then top up and freeze again. Or accept a toy nearer the top; it is still a rescue.
The ice will not come out of the container
Let the container stand briefly or run cool water over its outside. Avoid prying with sharp tools or hitting it on a hard surface.
The rescue is taking forever
Use a shallower block next time. Today, refill the bottle with lukewarm water and let an adult help melt around the toy’s body.
The tray is flooding
Pause for a moment, pour some water into the sink, and set the block back into the tray. A deeper pan and smaller bottle make the next round easier.
Three easy variations
Two-color ice
Add one drop of food coloring to the water before freezing if you are comfortable with possible staining. Use a pale color so the dinosaur stays visible.
Outdoor summer rescue
Place the tray on a shaded patio table. The warm air helps melt the block, while the tray keeps most of the water in one place.
Different chunky toy
Try one large washable plastic sea creature or construction vehicle with no detachable parts. Use the same container and water method, and clean the toy afterward.

A quick safety note
Frequently asked questions
How long does a dinosaur ice rescue take to freeze?
A large block is easiest to prepare overnight. A thick container can take longer than a shallow one, so check that the center is solid before you turn it out. For a quicker future batch, use a wider, shallower freezer-safe container.
What water should kids use to melt the ice?
Lukewarm tap water in a small squeeze bottle works well. An adult can refill it as needed. Avoid hot or boiling water around children.
Can I do frozen dinosaur rescue without a squeeze bottle?
Yes. A small cup or plastic spoon can dribble water onto the ice. The squeeze bottle simply makes it easier to aim without emptying a whole cup at once.
What if the dinosaur is stuck after the ice cracks?
Keep melting around the body and legs. Do not pull hard on a tail or horn, which may break off. Once the toy wiggles freely, lift it out.
Is this a good indoor activity?
Yes, if you put the block in a deep tray on a towel and keep a cloth handy. Work on a stable table or washable floor. Expect some water outside the tray anyway; the towel is there for a reason.
If your child would rather make something to hang in the window, the tissue paper contact paper suncatcher skips the water entirely.
Leave a Reply