
Cut, mount, press, repeat
How to Make Reusable Foam Stamps for Preschoolers
Big foam shapes, chunky handles, and a paint layer thin enough to make a real print. These stamps survive more than one enthusiastic thump.

A homemade stamp can survive more than three enthusiastic thumps, provided the shape is big, the handle is easy to grip, and the paint is thin. That is the whole engineering brief. Cut a few simple shapes from craft foam, attach them firmly to chunky blocks, and your three-year-old can print repeating patterns across a page without you drawing every star yourself.
The stamps take longer to make than a potato cut in half, but you can rinse and reuse them. You also control the shape. An ordinary circle can become a row of balloons, a leaf can become an entire tree, and a star can become seventeen stars because seventeen is apparently the correct number. I will show you how to mount the foam, load just enough paint, and keep the prints from turning into wet blobs.
For art made by hiding a colorful layer and scratching it back, DIY scratch-art paper is another multi-step project. These stamps work in the opposite direction: you build the printing tool first, then add a shape each time it touches the page.
DIY Foam Stamps for Preschoolers
Makes three reusable stamps and several prints.
Materials
- 3 palm-size smooth wooden blocks or sturdy cardboard blocks, about 3 inches wide
- 1–2 sheets 2 mm craft foam in contrasting colors
- Strong double-sided tape or washable craft glue appropriate for foam
- 2–3 tablespoons washable liquid tempera paint total
- 3–5 sheets white cardstock or thick drawing paper
Tools
- Adult scissors and pencil
- Shallow plate or paint tray
- Small scrap of cardboard for test prints
- Damp cloth and washable table mat

Step-by-step method
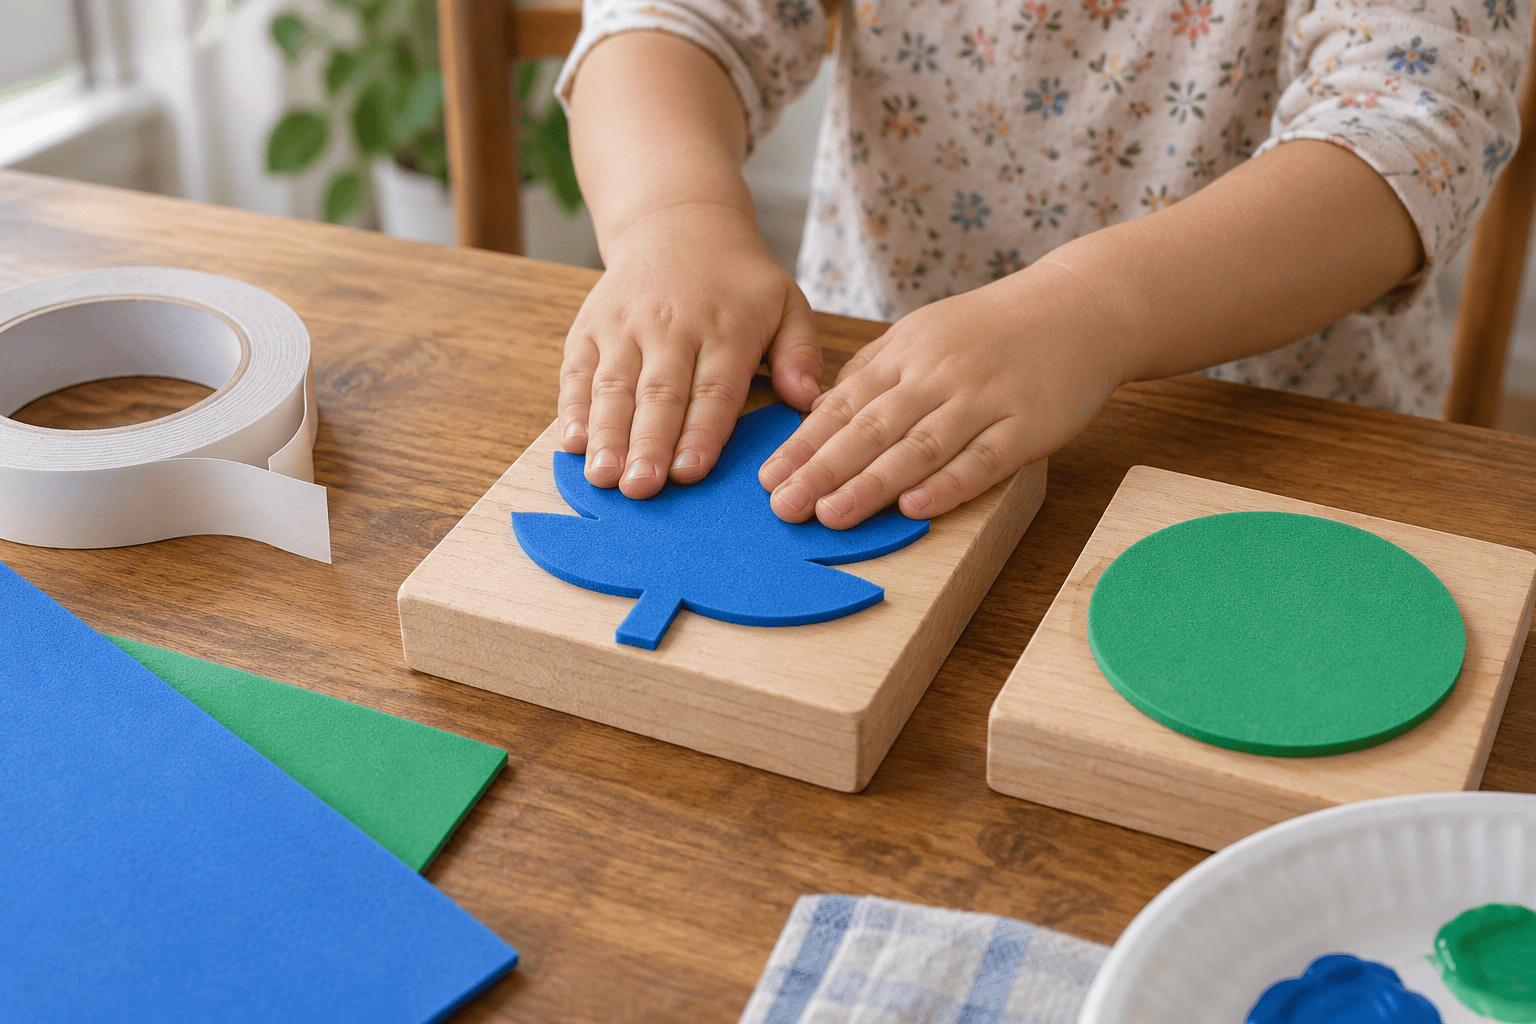
- Pick three bold shapes. Draw one circle, one broad leaf and one chunky star on the back of craft foam. Keep each well inside the face of its block. A shape that overhangs the wood will bend under a three-year-old’s hand and print as a smear.
- Cut the foam. An adult cuts slowly along the outlines. Children who use scissors comfortably can help with broad curves while you handle points. Keep the shapes in one piece and skip little glued-on eyes or stripes for the first set.
- Dry-fit each shape. Put the foam on the block without adhesive and check that there is a border of block around it. Hold the block as your child would. If a corner of the foam catches your finger, trim it now. The block should be a handle, not a puzzle.
- Attach firmly. Cover the back of each foam shape with strong double-sided tape, right out to its edges, then press it onto the block. If using craft glue instead, spread a thin even layer and let it dry completely according to the label before printing. Wet glue and wet paint are an especially slippery combination.
- Test on scrap paper. Press the dry stamp lightly onto an unpainted scrap. Check that the foam sits flat and does not peel at the corners. Reinforce any lifting edge before adding paint. Your child can help push down the big center, but an adult should check the smaller points.
- Load a thin paint layer. Put a little washable tempera onto a shallow plate and spread it with the back of a spoon or a spare scrap of foam. Touch the stamp face to that thin layer. If paint reaches the wooden sides, there is too much in the tray.
- Press straight down and up. Set the stamp onto cardstock, press the top of the block evenly, and lift vertically. Show your child one print, then hand over the block. Rocking side to side or dragging the stamp makes a doubled shape rather than a clean one.
- Build a repeating page. Try a row of circles or alternate two shapes. Reload only when the print becomes faint. Move wet sheets to a separate drying space so a sleeve does not land in the last perfect star.
The paint layer is the real secret
A stamp needs paint on the raised foam face, not a puddle around the block. Make one test print before giving the stamp to your child. A crisp outline with a slightly textured interior is normal; a full-page smear means the tray has too much paint. Wipe the foam face once, spread the paint thinner, and try again.
For a simple pattern, draw a line of pencil dots on scrap paper so your child can aim the block. On the real page, leave the dots off and let the row wander. A three-year-old’s repeat pattern is allowed to take an unexpected detour. If they press the same place again and again, move to a fresh corner rather than trying to rescue a saturated patch.
The easy painting activities collection has quicker options when making a tool sounds like more setup than you want. Here the reusable stamp is the point: it is made once, then used on cards, gift wrap made from plain paper, or a fresh page on another day.
Troubleshooting
The foam shape falls off
Dry the block and foam completely, remove old adhesive, and reattach with strong tape covering the whole shape. Press the edges firmly and test without paint before trying again.
The print is a blurry blob
There is too much paint or the block is sliding. Wipe the foam, spread a thinner layer in the tray, and press straight down and lift straight up.
Only part of the shape prints
The foam or block surface may be uneven, or your child pressed one edge harder. Add a thin foam backing under the low spot if necessary, then press the center of the block evenly.
The edges make a square mark
Paint has coated the block or the foam sits too low. Wipe the block edges before each print. Use a thicker foam sheet or add a second layer behind the shape, checking that it stays firmly attached.
The paper wrinkles
Use thicker paper and less paint. Move the wet sheet flat to dry. Do not stack fresh prints; the back of the next page will take a surprise print of its own.
Three ways to change it
Leafy branch
Use one broad leaf stamp and draw a simple branch on cardstock after the paint dries. Stamp leaves around it in one or two colors. Keep a clean stamp for each color if you want the shades to stay separate.
Homemade wrapping paper
Spread large plain paper on the floor over a wipeable mat and repeat one bold stamp with plenty of space. This is a longer painting session, so let one section dry before shifting the paper.
Shape sorting without a worksheet
Make two big shapes and let your child choose where each repeats: circles on one side, stars on the other. If they change the plan halfway through, you still have a cheerful printed page.
Let it dry, then keep the stamps
Leave printed sheets flat until the thickest paint patch is dry. Hang a finished page as it is, fold a small sheet into a card, or cut a broad stamped shape after drying. A damp print can transfer paint to the scissors and every following cut.
If your child wants a one-off pattern that cannot be repeated exactly, shaving-cream marbled paper uses a press-and-lift transfer from a tray. Stamps are for repeats; the foam tray makes swirls. Both use cardstock, so you can cut a stack of sheets once and split it between the projects.
A strip of stamped stars can become tickets for the cardboard shadow theater. Keep the paint off the translucent screen itself. Put a stamped paper sign on the outer cardboard frame only after it is completely dry.
Wipe washable paint off the foam with a damp cloth after play and dry the stamps face up. Do not soak a wooden block or cardboard handle; water can loosen the attachment. Store the blocks in a shallow box so the foam faces do not stick to each other. If one stamp loses a point, cut a simpler replacement shape rather than trying to rescue a tiny loose piece.
For a paper project with a clean taped reveal, painter’s tape watercolor art uses the background differently. The scratch-art paper lets a child draw by removing a dark layer. Your stamped pages can be proudly repetitive without being tidy.
Questions parents ask
What kind of foam works for homemade stamps?
Flat craft foam around 2 mm thick is a practical starting point. A large, single-piece shape attaches more reliably than thin details. Test the foam on scrap paper before making a full page.
Can I make foam stamps without wooden blocks?
Yes. A sturdy cardboard block or thick stack of cardboard can make a handle. Keep it dry and wide enough for your child to grip. Flat foam alone is harder to lift cleanly without getting paint on fingers.
Why are my stamp prints blurry?
The usual causes are too much paint or a block that slides while pressed. Spread a thinner layer on the tray and lift the block straight upward. Test once on scrap before continuing.
What paint should I use with foam stamps?
Washable liquid tempera works well when spread in a thin layer. A thick puddle fills the shape and smears. Keep separate shallow areas for different colors if you want clean prints.
How do I clean and reuse the stamps?
Wipe the foam gently with a damp cloth and let the block dry face up. Avoid soaking wooden or cardboard handles because the adhesive can loosen. Check each shape edge before the next session.


Leave a Reply