
Tuck, watch, water lightly
How to Grow a Bean in a Clear Cup with a 3-Year-Old
A paper towel, a clear cup, and a bean you can actually see changing. The setup takes minutes; the windowsill gets several days of attention.

The bean-in-a-cup project is wonderfully nosy. Instead of hiding the seed in soil, you tuck it against a clear cup with a damp paper towel and watch for the root through the side. Your child can help place the bean and check the towel. Then one morning there is a white root and the cup is important.
The details matter: the towel needs to touch the bean without swimming in water, the bean needs to face the clear wall, and the cup should stay somewhere bright without baking in direct afternoon sun. This is a several-day project, with a brief daily check instead of constant poking.
If your child wants an immediate reveal while the bean takes its time, the frozen dinosaur ice rescue is a more hands-on project for another afternoon. The bean cup is for that small daily moment at the window.
Grow a Bean in a Clear Cup
One visible bean sprouting setup.
Materials
- 1 clean clear plastic cup, about 8–12 ounces
- 2 large dry lima beans, one for the cup and one spare
- 2 plain white paper towels
- 2–4 tablespoons water to start, added gradually
- 1 shallow plate or tray for drips
Tools
- Small spoon or fingers for positioning the bean
- Optional second cup for comparison
- Optional small pot with drainage and potting mix for later

Step-by-step method
- Choose and inspect the bean. Pick one intact large dry lima bean from a packet meant for planting or an ordinary dry bean packet. A split or visibly damaged seed is less useful for watching a whole sprout. Keep the extra bean as a backup in case the first never changes.
- Dampen the paper towels. Wet the towels with a little water, then squeeze gently so they are damp but not dripping. Your child can help with this part over the sink. If water runs down your wrist, the towel is too wet for the cup.
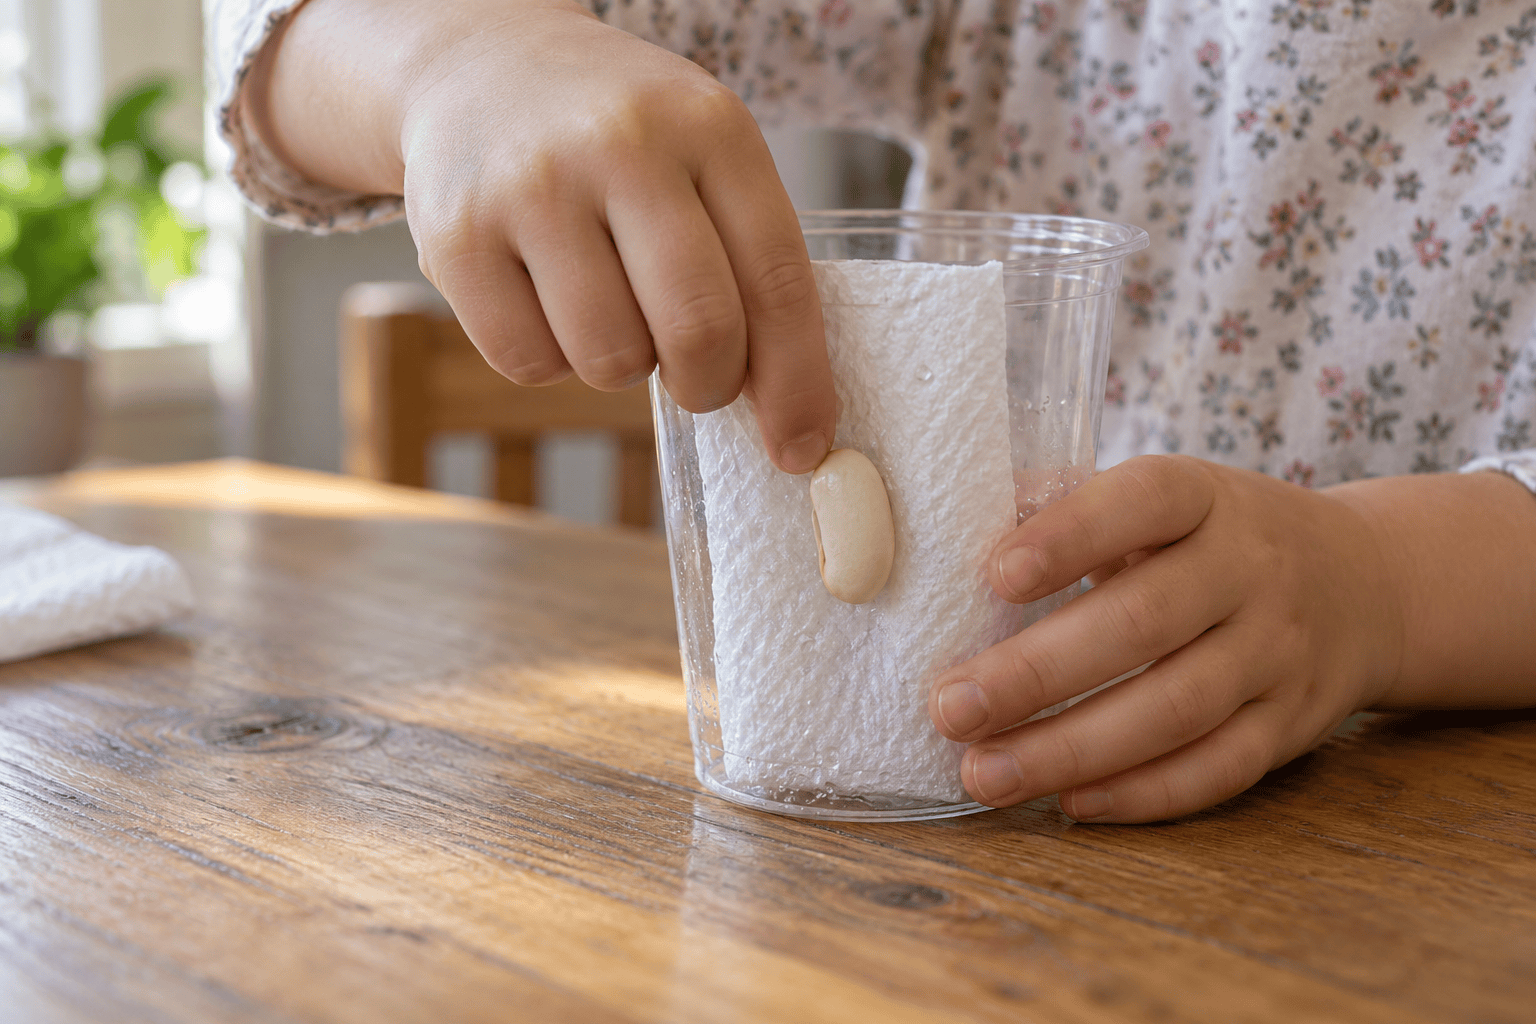
- Line the cup. Fold or roll the damp towels loosely and place them against the inside wall. Leave a little room in the middle. Press them into a smooth layer so the bean can sit between towel and clear plastic rather than dropping to the bottom.
- Slide the bean into place. Let your child place a bean between the paper towel and the inner wall about halfway down the cup. Turn the cup and confirm you can see it clearly from outside. If it disappears behind a fold, ease it back into view with a clean finger or spoon.
- Find a bright spot. Set the cup on a shallow plate in bright indirect light, such as near a window that does not get scorching afternoon sun. Keep it away from heaters. Leave the cup uncovered so you can check the towel and air can circulate.
- Check once a day. Touch the exposed top edge of the towel. If it feels dry, add a teaspoon or two of water along the towel, not directly onto the bean. Tilt the cup gently to see whether water has collected at the bottom; pour off any puddle.
- Look without digging. Watch for the bean to swell or split and for a white root to emerge. The root usually heads down, while a shoot eventually turns up. Timing varies with the bean and the room. Resist pulling it out to check; the best view is already through the cup.
- Decide what comes next. Once roots and a small shoot are visible, you can keep observing briefly or move the sprout into a small pot. If the towel smells sour or grows fuzzy, discard it, wash the cup, and start again with the spare bean.
What your child can notice each day
Put the cup in the same spot after checking it so you can compare what changed. At first the bean may simply look bigger as it takes up water. A pale line may appear where the seed coat opens. Later you may see a white root against the plastic, followed by a shoot. Some beans take longer or do not sprout. This is a living seed, not a timer you can set for Tuesday.
Let your child describe what they actually see: “the white bit is longer” or “the bean cracked.” You can sketch the cup on a piece of paper every few days, or take photos from the same angle. No chart is required. If the root curves away from the wall, rotate the cup and look from another side before disturbing anything.
For another project where your child predicts what happens and checks a result, the foil boat sink-or-float activity happens in one sitting. Here, leaving the setup alone between observations is part of making it work.
Troubleshooting
The towel is drying out
Add water a teaspoon at a time along the towel, then check again later. Move the cup out of direct sun or away from a heater. Damp is the goal, not a pool.
There is water in the bottom
Carefully pour off standing water while holding the towel in place. If the towel is soaked through, replace it with freshly damp towels and gently return the bean against the wall.
The bean looks fuzzy or smells bad
Discard the seed and towel, wash and dry the cup, then restart with a fresh bean. Use less water and allow air around the cup. Do not keep a moldy setup on the windowsill.
Nothing has happened
Give it more time if the towel is damp and the bean looks intact. Try the spare bean in a second cup for a comparison. Old or damaged beans may not sprout; a new seed is a reasonable reset.
The sprout leans or the root vanishes
Turn the cup to look around all sides. The root may grow inward through the towel rather than staying pressed to the wall. Avoid peeling it away just to get a better picture.
Three ways to change it
Two-cup comparison
Set up two clear cups the same way and put one in a brighter indirect spot and one in a dimmer spot. Keep both towels damp. Watch what actually happens without promising that one will win.
Different large beans
Try a second variety of large dry bean in another cup. Use separate cups so you can see which seed does what. Avoid tiny seeds for a three-year-old setup with loose materials.
Window photo diary
Take a picture every two or three days with the cup in the same place. Your child can point to the new root or shoot in the photos. This keeps the observation simple and avoids writing an elaborate project log.
When and how to move the sprout into soil
The paper towel cup is a viewing setup, not a permanent home. When the seed has a root and a shoot with early leaves, prepare a small pot with drainage and premoistened potting mix. Make a hole deep enough for the root to fit without folding it sharply. An adult can handle the fragile sprout while your child helps add a little mix around it.
If roots have grown into the towel, do not yank them free. Tear or cut a small section of towel around the roots and plant that small piece with the bean. Keep the sprout in a bright place and water the soil when the surface begins to dry. Outdoor planting depends on your local weather and the kind of bean; the indoor cup is already a complete project even if you never plant a garden.
If planting is not in the cards, take a last good look and compost the paper towel and plant if appropriate for your setup, or discard them. Wash the cup and tray. A fresh cup can be started later with another bean, although you may find your three-year-old has moved on to a completely different obsession by then.
The household-item sensory bins are useful for a hands-on play session while this cup is quietly doing its thing. And if your child likes building the setting for a story, the felt story board has movable trees and animals without any waiting for roots. For a colorful make-it-now project at the table, salad spinner painting has a reveal after a few turns rather than a few days.
Questions parents ask
How long does a bean take to sprout in a cup?
You may see swelling or a split before you see a root, and the timing can vary from several days to longer. Keep the towel damp and check daily. If the seed stays unchanged or deteriorates, start another cup with a fresh bean.
Should the paper towel be soaking wet?
No. Wet it and squeeze out extra water before lining the cup. Add a little water if it dries, and pour away any puddle in the bottom.
Does the bean cup need direct sunlight?
Bright indirect light is a useful place to start. Strong direct sun can dry the towel quickly or heat the cup. Check the moisture and move the cup if the window is too hot.
Can I use a dried bean from the grocery store?
An intact ordinary dry bean may sprout, although results vary. A fresh packet intended for planting is another option. Use a large bean that is easy to see and keep a spare ready.
What if the roots grow into the paper towel?
Leave them alone while observing. When you move the sprout to soil, tear away a small section of towel with the roots rather than pulling the roots loose. Handle it gently and plant the root downward.



Leave a Reply