
Cut, wrap, rearrange
How to Make a Felt Story Board for a 3-Year-Old
One snug felt-covered board, a handful of big shapes, and a story that can change every thirty seconds. Here is how to make the pieces stay put.

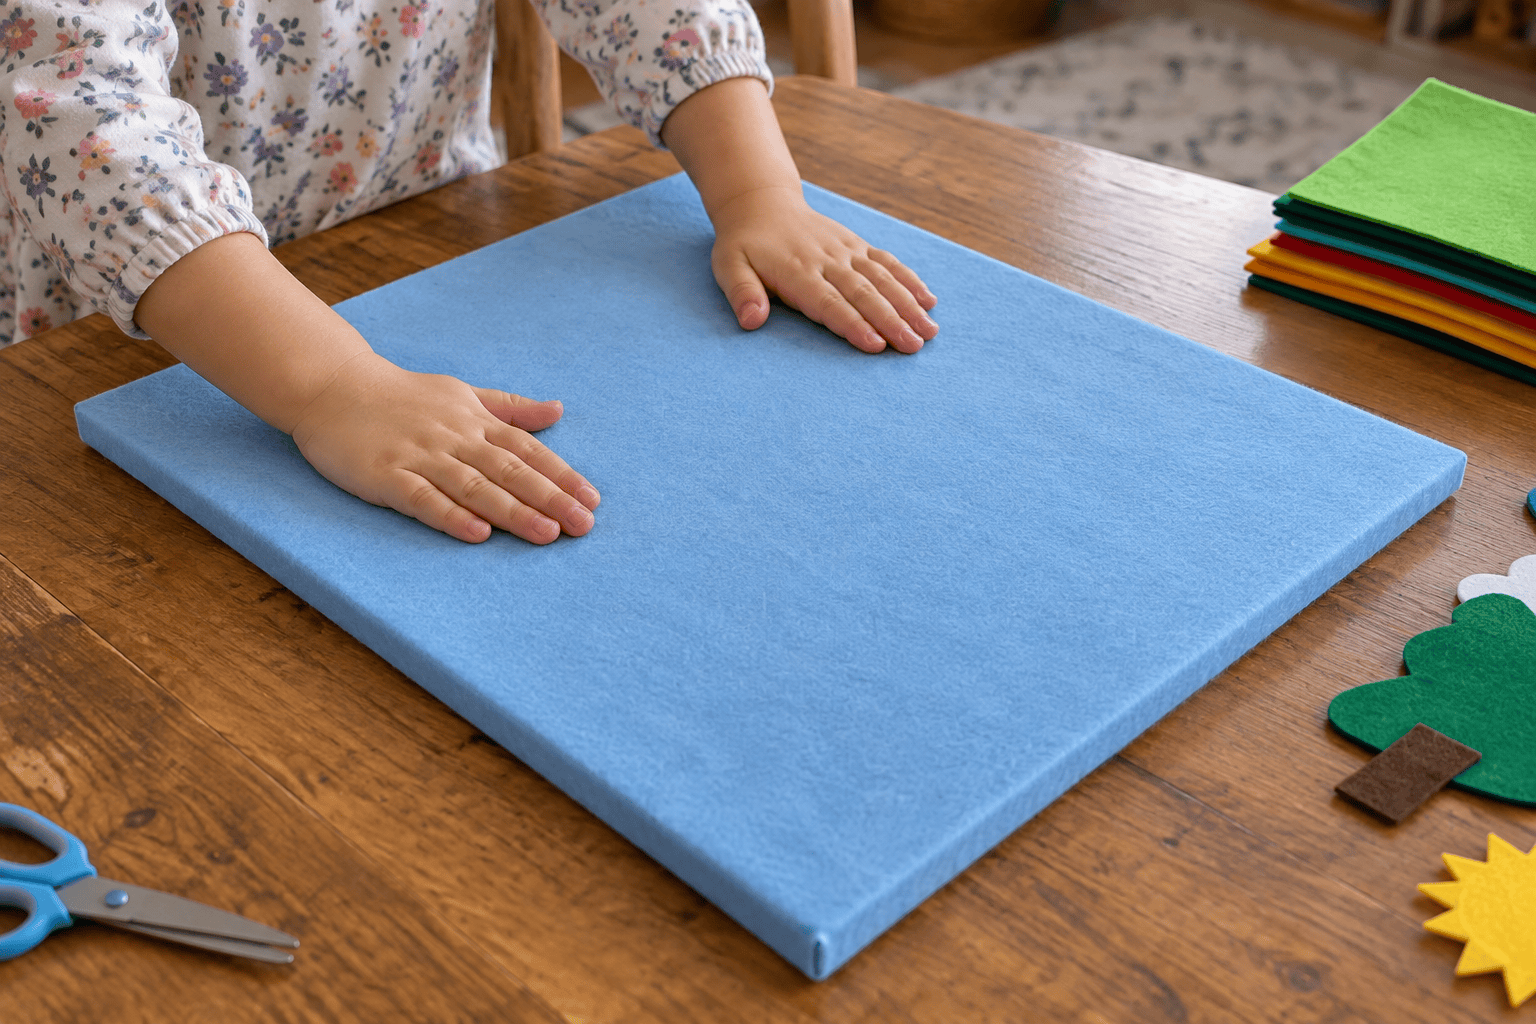
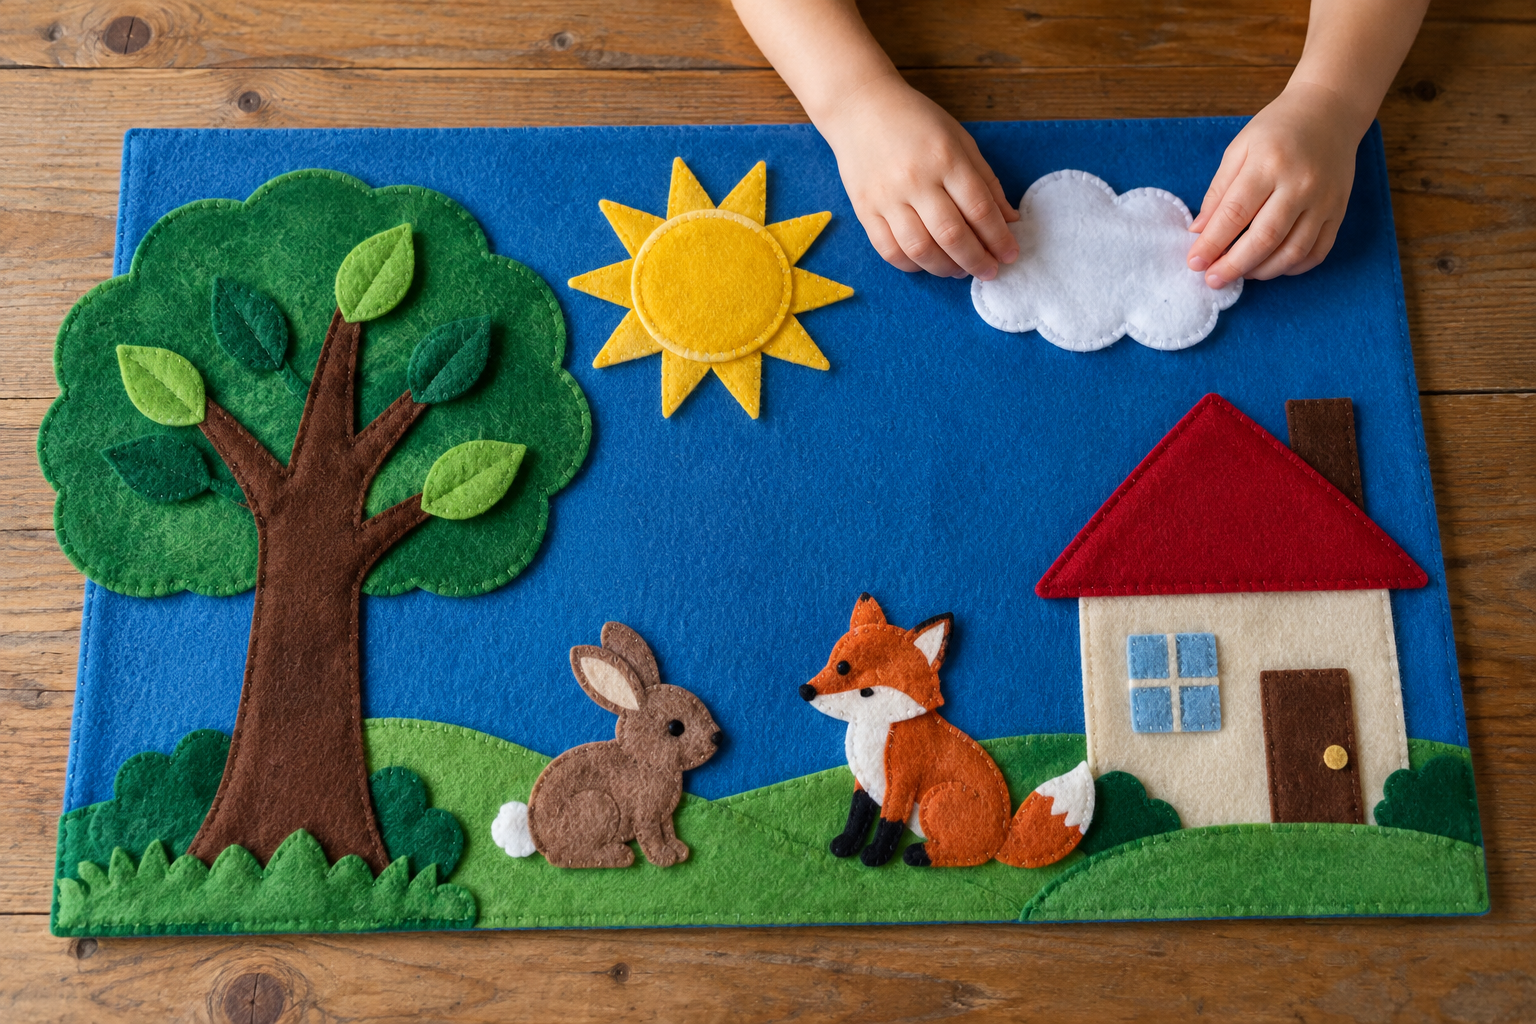
A felt story board is one of those projects that looks suspiciously tidy in photos. In real life, the sun may live under the house and a felt dog will probably become mayor. That is exactly the point. You make a sturdy felt-covered board and a handful of large shapes; your three-year-old can move them around without waiting for glue to dry every time the story changes.
The useful trick is that loose felt usually clings to felt. You do not need tiny Velcro dots on every piece. The board does need a snug, smooth covering, and the shapes need to be large enough for small hands to pick up. This tutorial covers both, plus what to do when the pieces slide off instead of sticking.
For a full three-dimensional pretend room, the shoebox dollhouse uses cardboard furniture. This board is the flat, packable cousin. It can be a forest one minute and a street scene the next.
Felt Story Board for a 3-Year-Old
One reusable board with six to eight large movable shapes.
Materials
- 1 piece lightweight foam board or sturdy cardboard, about 12 by 16 inches
- 1 piece light blue or other background felt, at least 16 by 20 inches
- 4–6 sheets felt in contrasting colors, about 9 by 12 inches each
- Several strips strong tape for fastening on back
- 1 large envelope or zip pouch for the shapes
Tools
- Adult scissors
- Fabric marker or washable chalk for tracing
- Ruler and optional blunt pencil

Step-by-step method
- Cut and check the base. An adult cuts the foam board or cardboard to roughly 12 by 16 inches. Run a hand around the edges and trim any torn corners. If you use corrugated cardboard, choose a flat piece without a center fold; a warped board will make loose shapes slide toward the table.
- Measure the background felt. Lay the board on the felt and leave about two inches of extra fabric on all four sides. Cut one large rectangle. Do not cut it flush with the board; the extra fabric is what lets you wrap and secure the surface without glue on the front.
- Wrap the long edges. Place the felt fuzzy side down, then center the board on top. Pull one long edge around to the back and tape it down. Pull the opposite edge snug, not stretched, and tape it down too. Flip the board to check for wrinkles before securing the short sides.
- Fold the corners. Fold each corner like a simple gift wrap and tape the extra felt to the back. Keep tape off the front; felt pieces do not cling to tape. If a corner bunches up, loosen it and fold again. It is much easier to fix now than after four more strips of tape.
- Draw a few big shapes. Start with a palm-size sun, a cloud wider than your hand, a house about six inches tall, a tree, and one or two large animals or people. An adult can draw simple outlines on the back of the colored felt. You do not need elaborate faces or tiny windows.
- Cut the pieces. An adult handles detailed cuts. A child who uses scissors comfortably can help with broad straight edges under supervision. Keep every finished piece large and one-piece; a little separate eye or chimney tends to vanish immediately.
- Test the scene. Set the board flat or prop it at a shallow angle against a wall. Let your child press a piece onto the background and move it. If the pieces cling while flat but slide when upright, keep the board flat or choose fuzzier felt for the next pieces.
- Invite the story. Offer only five or six shapes at first and ask an open prompt such as “Who lives here?” Then follow their answer. A three-year-old may use a tree as a rocket; there is no need to correct the landscape.
Make pieces that get used, not lost
Aim for shapes roughly three to six inches across. A simple animal silhouette with four chunky legs survives being picked up by the tail better than a delicate shape with a skinny neck. Cut the house as one piece, then add a large contrasting door if you want another movable part. The simpler set often gets played with longer because there are fewer pieces to hunt for under the sofa.
The colored felt scraps can become roads, ponds or blankets, as long as you keep them large. To repeat a shape, trace the first cutout onto another felt sheet. If your child wants a whole storefront and shoppers, the cardboard grocery store pretend-play build gives that storyline a room-size setting. Here the little pieces stay in an envelope when play is over.
Troubleshooting
The pieces fall off
Try the board flat first. Press felt side to felt side, not the smooth backing of a stiff felt sheet. A fuzzier background or thicker felt pieces may cling better; test scraps before recutting the whole set.
The board wrinkles
Peel back the tape on one edge, smooth the front from the center outward, and retape while holding light tension. Do not tug so hard that the foam board bows.
Corners look bulky
Trim only the excess felt at the back corner, leaving enough overlap to cover the edge. Fold like a gift and retape. Keep scissors away from the front surface.
Felt shapes curl
Smooth each piece between your hands, then store flat under a lightweight book for a day. Very thin felt can be backed with a second large felt layer, but test the cling before making all the pieces double thickness.
The board keeps tipping
Use it flat on a table or floor. To prop it, lean it at a shallow angle against a wall with its bottom on a nonslip mat; skip a tall easel for a child who presses hard.
Three ways to change it
Weather board
Make a large sun, cloud, raindrop cluster and snowflake from separate broad pieces. Your child can change the sky in seconds. Avoid thin snowflake arms that tear when pulled.
Farm scene
Cut one big barn, a fence strip, two animals and a patch of grass. Leave the fence as one solid strip instead of tiny posts. The animals do not need eyes to have very serious conversations.
Travel-size board
Use a smaller piece of stiff cardboard, about 8 by 10 inches, with three or four oversized shapes. Check that the shapes still fit flat in your storage pouch rather than folding into a felt burrito.
How to play with it and put it away
Start with your child’s idea, even if it has no beginning or end. You can move a cloud over a house and ask what happens next, or let your child assign voices to two animals. Keep questions light. This is a prop for pretending, not a quiz about the correct place for a tree.
If the board is becoming a dollhouse floor, let it. You can put a tiny handmade room next to it later with the shoebox dollhouse tutorial. If your child enjoys building the place where characters meet, the salad spinner art makes bold paper backgrounds you can tape behind a separate scene once dry. Keep wet paint far from the felt board itself.
When the game ends, count the shapes together without making it an accounting crisis. Put them in the envelope and tuck it behind the board with a strip of tape or in a nearby basket. Store the board flat so the background stays smooth. A felt scene takes seconds to bring back out, which is especially helpful when dinner is ten minutes away and someone wants an entirely new world.
The low-mess toddler crafts roundup is useful if your table needs a break from cutting. On a day when your child wants something changing on its own, growing a bean against a clear cup trades pretend scenery for a real root to watch over several days.
Questions parents ask
Do felt pieces stick without Velcro?
Many felt pieces cling to a felt background on their own, especially when both surfaces have some fuzz. Test the actual sheets before building the board. If a smooth sheet slides, try a fuzzier one and use the board flat.
What size should a felt story board be?
About 12 by 16 inches gives a three-year-old room to move several large shapes. A smaller board can travel, but reduce the number of pieces rather than making everything tiny.
Can I use cardboard instead of foam board?
Yes. Choose sturdy, flat cardboard without a crease. Tape the felt snugly on the back and keep the board flat during play if it bends.
What should I put on a felt story board first?
A sun, cloud, tree, house and a couple of large animals are enough. Let your child show you which extra character the story actually needs. This is much less work than cutting an entire felt civilization at once.
How do I clean the felt board?
Shake off crumbs and lift lint with a clean lint roller used gently. Blot small marks with a barely damp cloth and let the board dry flat. Soaking the board can weaken a cardboard base and the tape on its back.




Leave a Reply